
TL;DR; Summary
The Raspberry Pi Zero W is a great device to take images and if you want to do the same look at my corresponding GitHub repo:
Despite the small size and limited resources the Raspberry Pi Zero W possesses, it is useful to take images when coupled with a camera since you have full control compared to many commercial solutions: How often should an image be taken, where should it go, what is supposed to be in it, and you do not need an app nor another server not owned by you for data storage. The downside is of course that you might need to manage things a bit more yourself (or it’s an upside, make up your own mind :-)).
Hardware
In terms of hardware it is quite straightforward what you need and it’ll run you around :
- A Raspberry Pi Zero W (or other models, if you want more than 1 image per minute especially a beefier model) including an SD card
- Power Supply (rugged or protected)
- Any of the cameras that work with the Pi, make your choice (I used the official old 5 MP, newer 8MP and a wide-angle one so far)
- A case for the Pi that delivers weather protection
- Hopefully, a WiFi in place to connect to it as it makes wiring (usually) easier
- Or alternatively ethernet + ethernet adapter
I won’t go into the whole setup of the Pi here as your solution will vary. I had a version in a construction site halogen lamp housing (as they are cheap and you get holes for wires) or a junction box with a transparent cover that can be screwed on. In one setup I have suction cups holding the camera in place, in another everything is attached with screws and one centimeter away from a glassplate.
Some things to consider for your specific setup are:
- Is there Wifi? If not you might need ethernet and an adapter (or a Pi that has it on board)
- Is there power within 5m (USB limit)? If not you might need a transformer in the box and run 220V to it. I actually did one that runs on 12V that comes in via ethernet cable
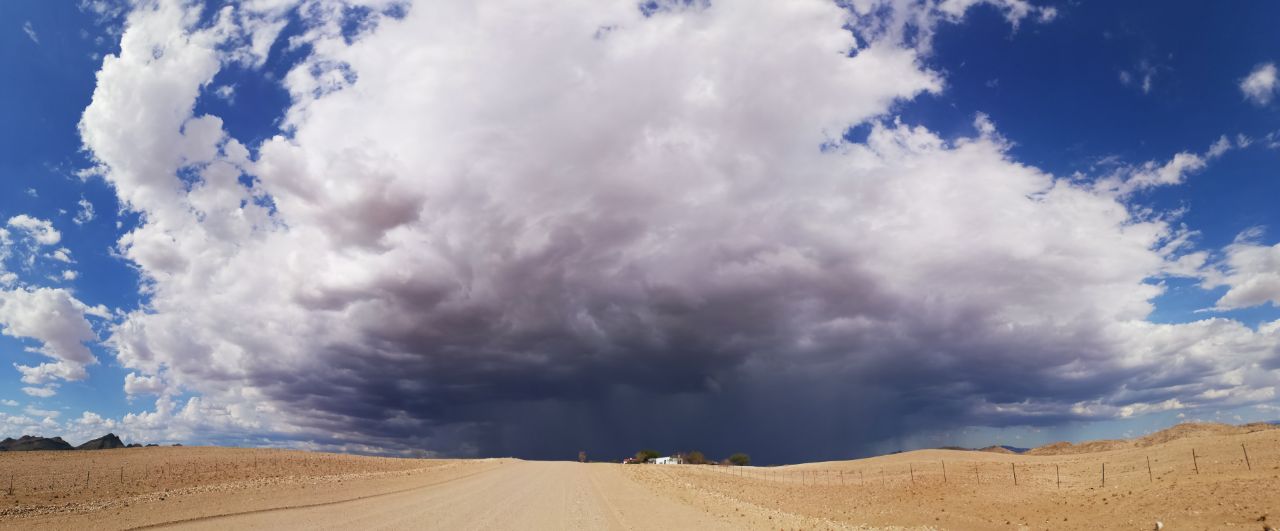
- What do you want to record? I really like the wide-angle of my last version as it depicts so much scenery but the pictures are larger, and require more space …
- Do you want to do a timelapse? If yes, you could record a video but in my opinion, its nicer to take a picture, add information and transfer it. This way you can later select what you want from it, data usage should still be less and processing can be outsourced. This assumes you will want to store images and have the infrastructure to do so
Software
From a software point, the default RaspberryOS comes with all the tools you need. I recommend adding the Raspberry autohotspot to it if you run on WiFi as it allows you to login/debug things. Other additions are graphicsmagick/imagemagick to add informational text to your image. You can find a version of my script that I usually use (or in similar form) at my GitHub repository (its linked to my dolueg2 project as the images are taken at the MCR and shown on the live dolueg2 page. The relevant files (as described in the README.md as well) are rpistill_pic2.sh and picam_timelapse.py where the former takes pictures and is intended to be run via a cronjob and the latter creates a timelapse based on images in a folder from the last couple of X days in a certain format.
For an example see this video
Things that will need adjustment are where the files should be sent to and who to send an email to if the SD card gets to full. Of course you might like to provide a measurement data source from somewhere or comment that part out. I do like the banner on the bottom as I’m usually not interested that much in the bottom of the images (only for orientation).
Connectivity
So that you can always reach your timelapse camera it might be useful to get a reverse ssh tunnel running on it to your more permanent infrastructure. I followed the information here and installed autossh as a systemctl service which means I could usually simply reconnect to it. Alternatively I often also push the IP of the timelapse Pi to an easily accessible location. This might not always be an option as the IP won’t necessarily help you connect to it.
Finishing up
While this information here is mainly a showcase/collection of links to other resources I hope it will help somebody to build their own version of a Raspberry Pi timelapse camera. Enjoy!